
remove object from image for interior designers
Remove Object from Image for Interior Designers
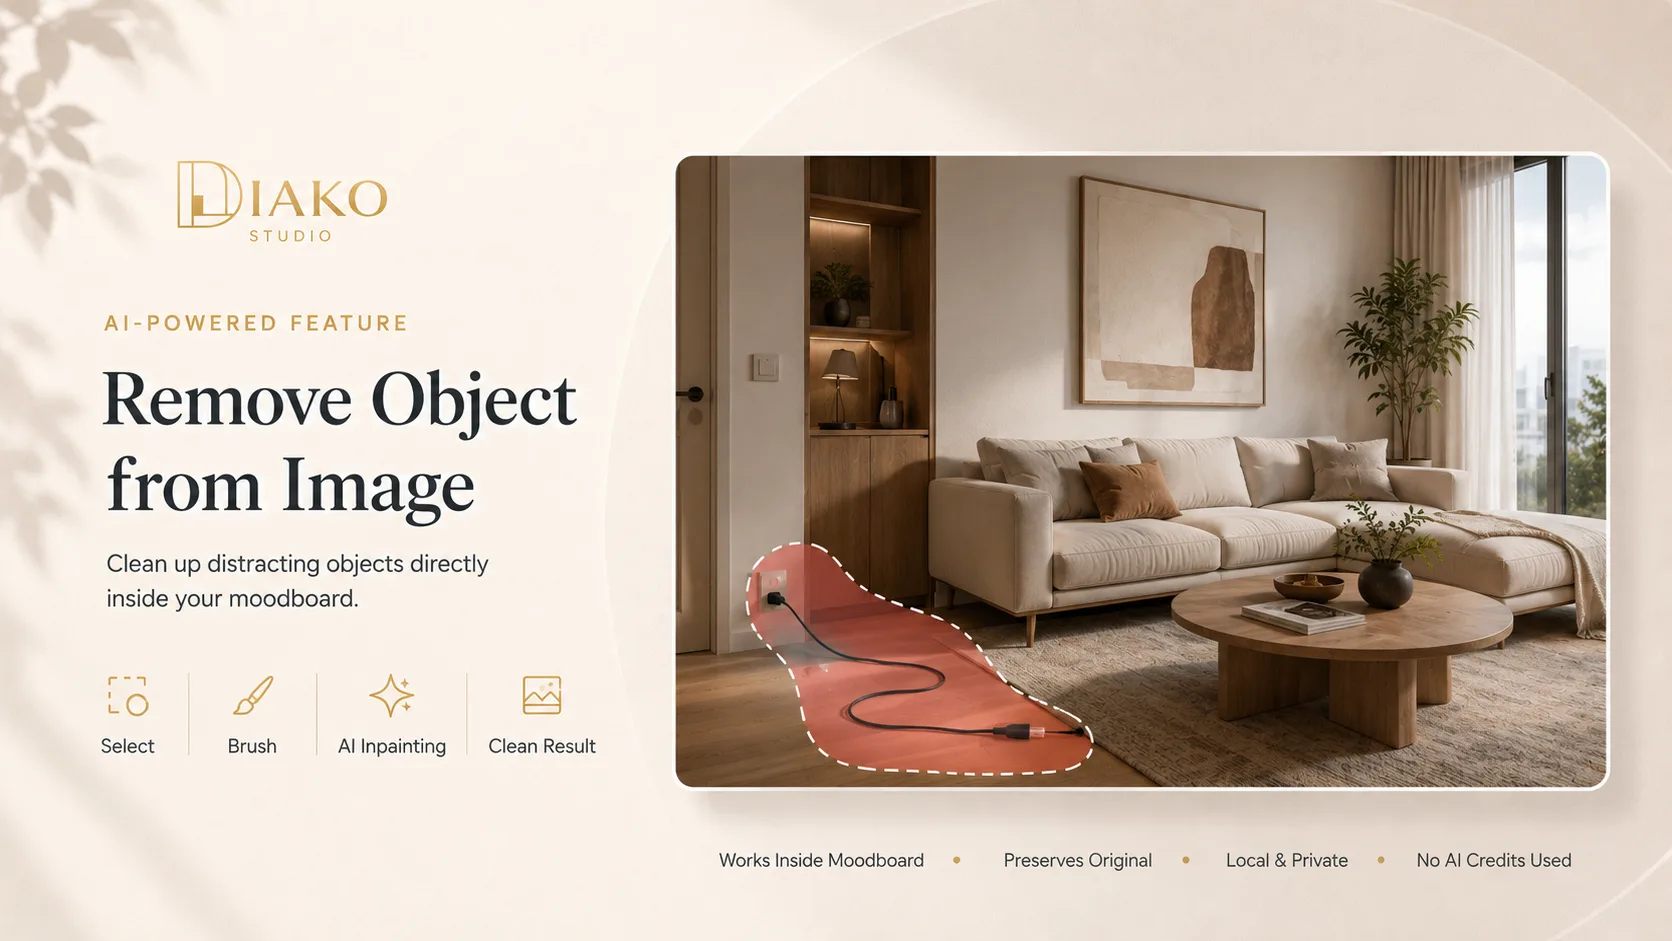
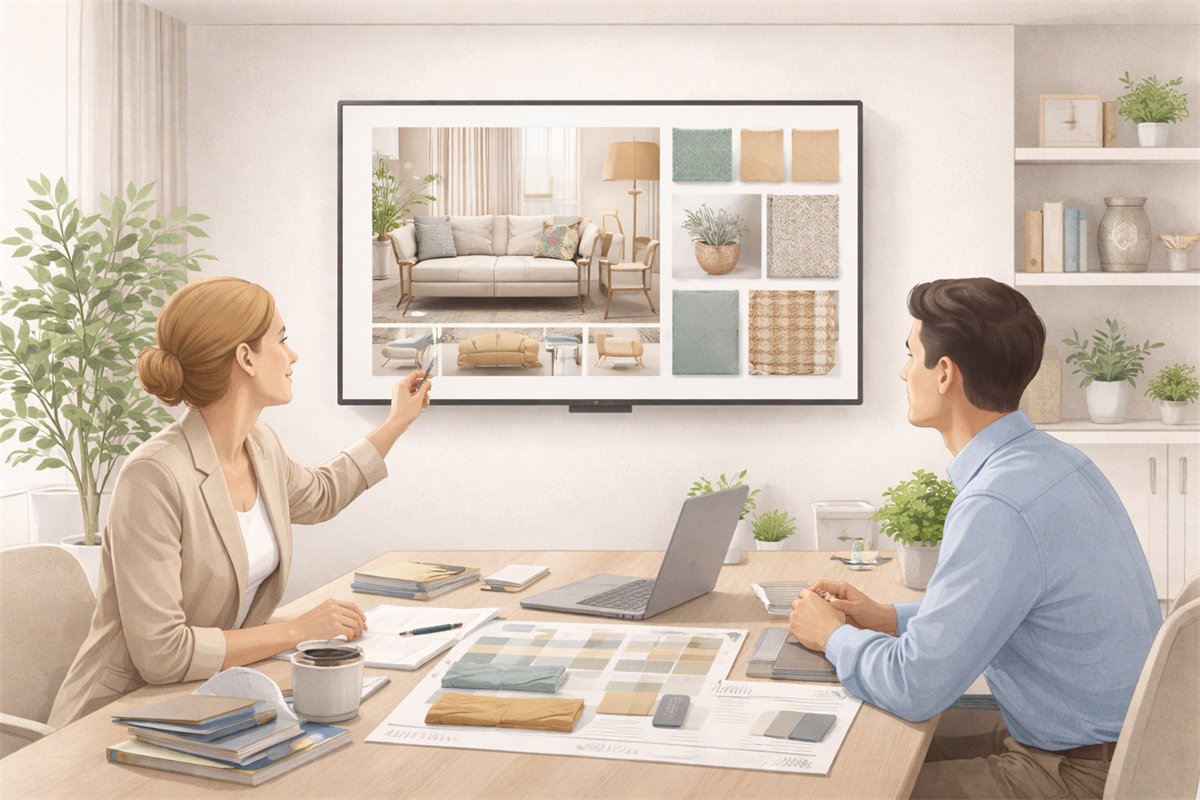
Diako Studio helps interior designers remove unwanted objects from images without leaving the moodboard workflow. Instead of exporting a source photo into another editing app, the designer can brush over the distraction, generate a cleaner result, and keep the updated image inside the same concept, presentation, and review process.
- Built into the moodboardClean up a source image without leaving the interior design moodboard workflow.
- Local AI inpaintingUse self-hosted inpainting to reconstruct walls, floors, surfaces, and patterns with more privacy.
- No AI credit costRemove distractions from presentation images without spending company AI credits.
See how to remove an object from an image inside the moodboard workflow
This walkthrough shows how designers can brush over unwanted objects, generate a cleaner result, and keep the cleaned image inside the same interior design moodboard workflow.
Remove Object from Image for professional studio workflow
- Remove distracting objects, people, watermarks, and visual clutter directly inside the interior design moodboard workflow.
- Keep the cleaned image usable as a normal board element instead of producing a disconnected export.
- Preserve privacy because the feature runs on self-hosted local AI instead of sending image data to a third-party API.
- Avoid AI-credit cost for image cleanup because the object removal pipeline is handled locally.
- Use non-destructive cleanup for product photos, room photos, and presentation images before client review.
Built to support connected studio handoffs
- Open the image inside the moodboard and start the Remove Object from Image tool.
- Paint over the unwanted object, person, watermark, or distraction using the adjustable brush.
- Send the selected area to the local inpainting engine so surrounding walls, floors, surfaces, and patterns can be reconstructed.
- Review the cleaned image and keep it as a normal moodboard element if the result looks right.
- Undo, revert, or continue refining the image before client presentation when needed.
Object removal workflow
Clean up source images before client presentation without leaving the moodboard
This workflow is especially useful when the board includes room images, sourced product photos, or inspiration visuals that need quick cleanup before they become client-facing.
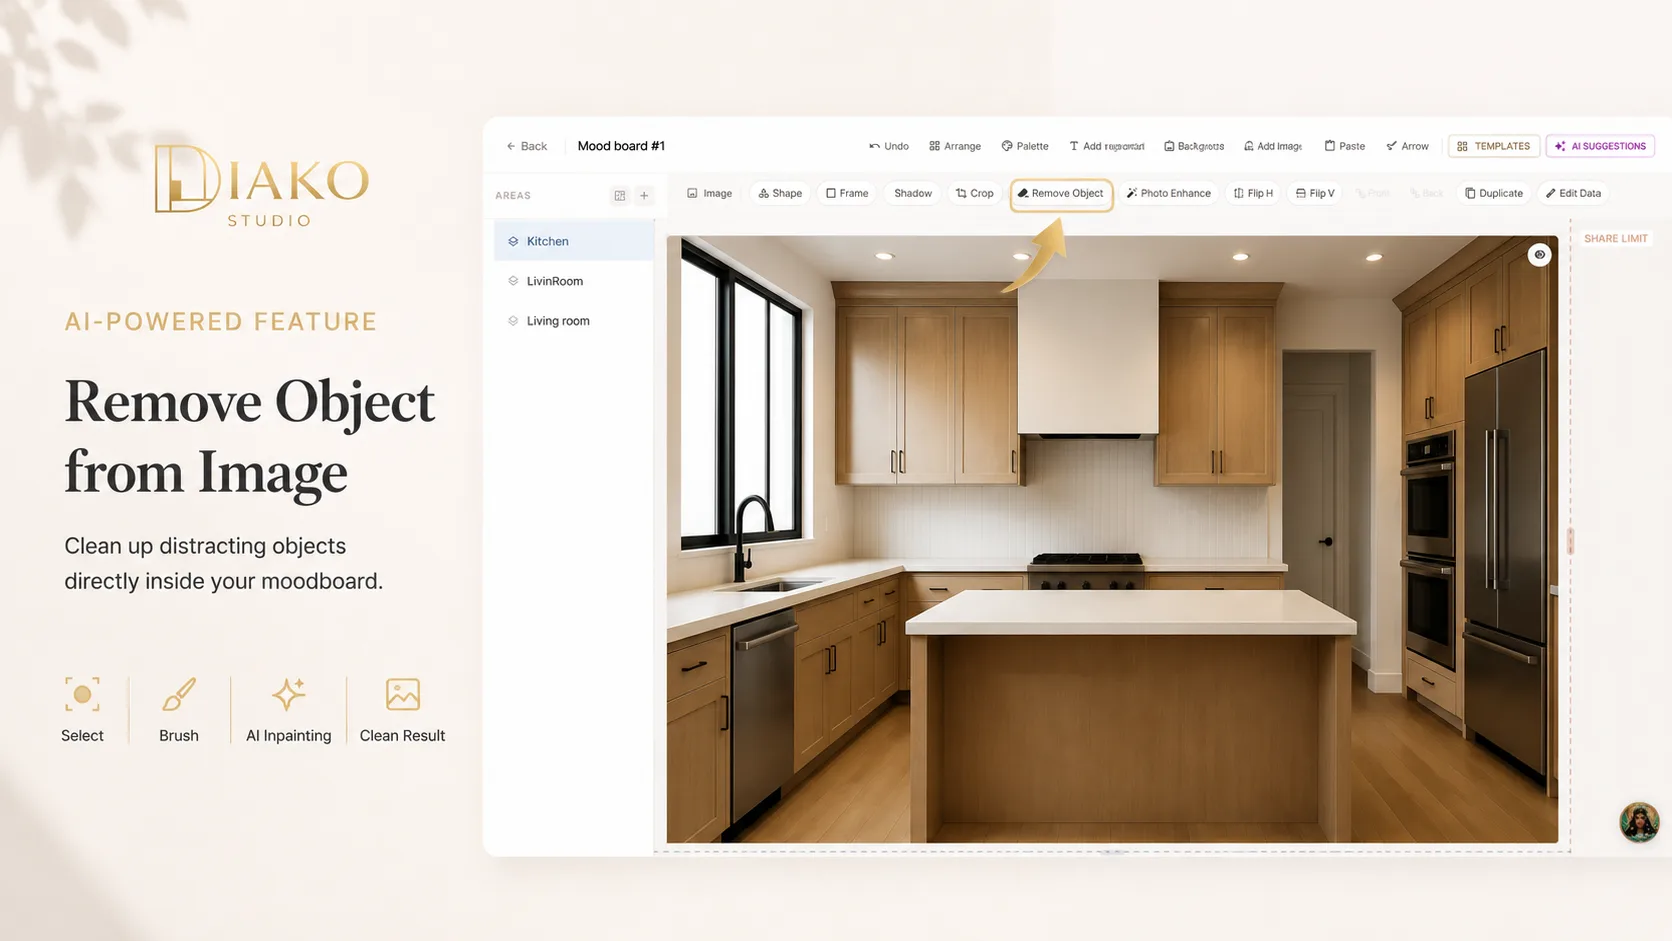
Open the image and start the remove-object workflow from inside the moodboard
The cleanup starts where the designer is already working. Instead of exporting the image into another tool, the designer opens the object-removal mode directly from the board and prepares the image for inpainting.
- Start the cleanup from the active moodboard image.
- Keep the image inside the same design and presentation workflow.
- Avoid extra exports for straightforward image cleanup.
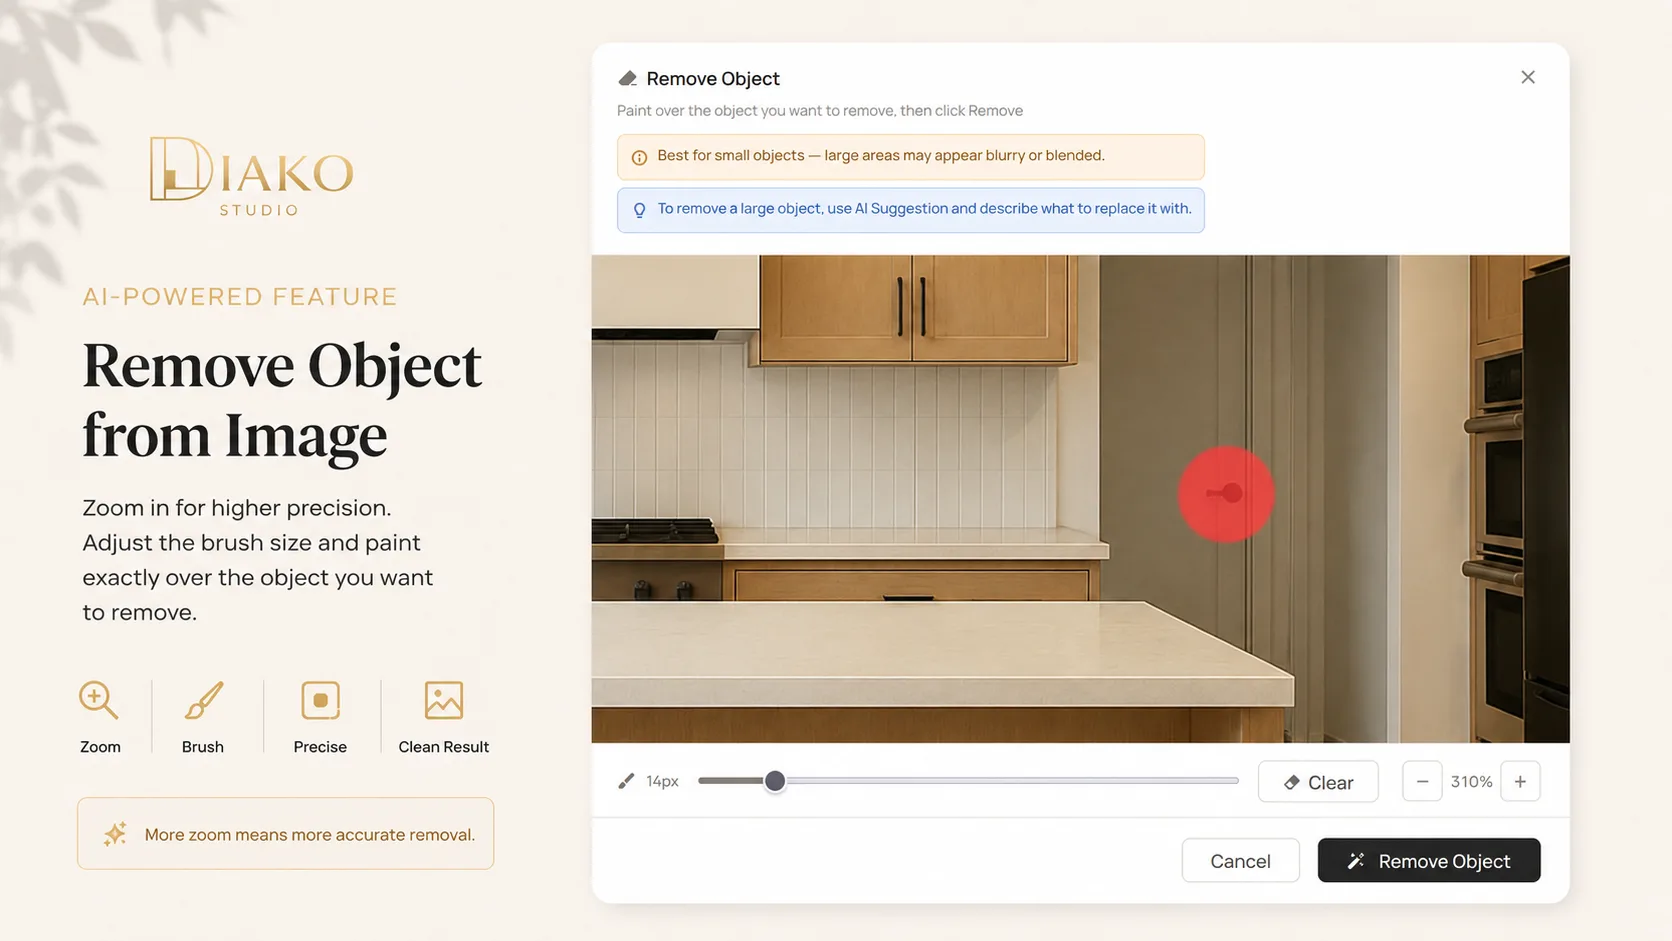
Brush over the unwanted object, person, watermark, or distraction
The designer marks only the area that should be removed. This keeps the cleanup focused and gives the inpainting model a clear target while preserving the rest of the image.
- Use the adjustable brush to paint over the exact area that should disappear.
- Target only the unwanted region instead of overediting the whole image.
- Prepare the image for localized, context-aware inpainting.
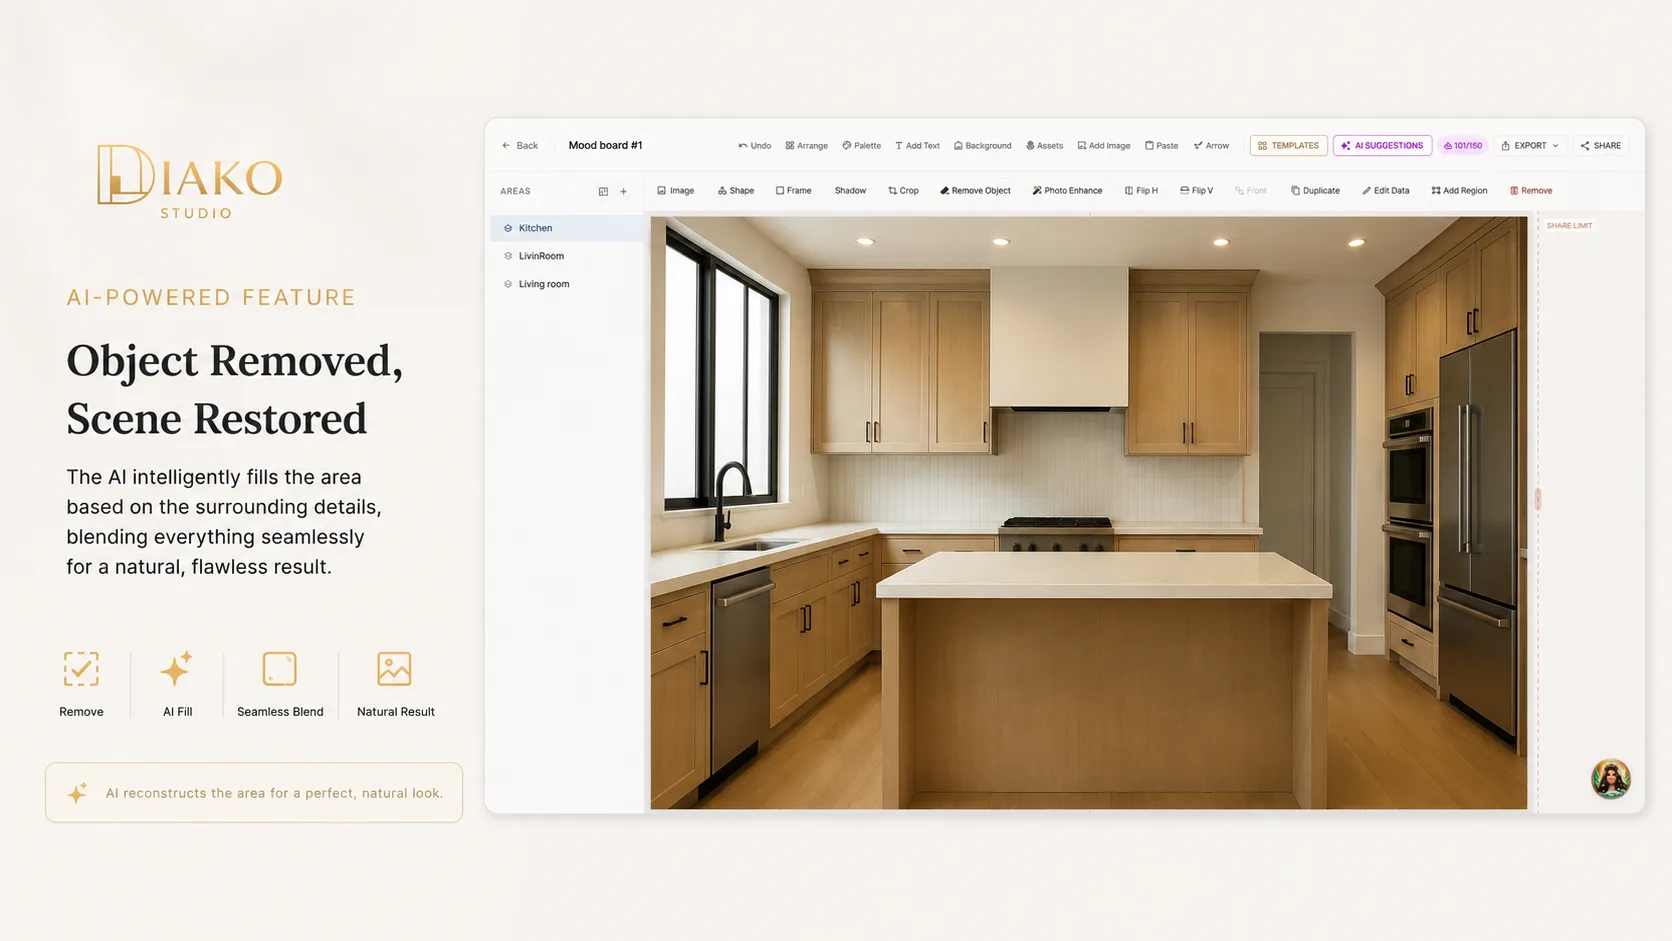
Let the local inpainting engine rebuild the missing area realistically
Once the region is marked, the self-hosted inpainting engine reconstructs the missing section based on nearby content. That can include walls, floors, surfaces, textures, and architectural patterns that need to continue naturally.
- Use local AI inpainting to rebuild the cleaned area from surrounding image context.
- Reconstruct surfaces and patterns so the result feels natural rather than patched.
- Keep image processing private because the workflow stays on self-hosted infrastructure.
Review the cleaned image and keep it in the moodboard if it improves the presentation
The final image can stay inside the board as a regular design element, which means the cleaned result is immediately useful for concept presentation, review, and next-step workflow. If it is not right, the designer can undo or revert at the board level.
- Keep the cleaned image as a normal moodboard item when the result is strong.
- Use the updated visual for client-ready presentation without leaving the board.
- Undo or revert the cleanup if the result needs to be rolled back.
Reduce friction inside the studio workflow
- Product and room images arriving with distracting objects that weaken the presentation.
- Designers losing time by exporting source images into separate editing tools for simple cleanup.
- Client-facing moodboards looking less deliberate because of avoidable visual clutter.
- Privacy concerns around sending project imagery to third-party editing services.
Works better because it connects to the surrounding workflow
Related features
Explore the connected modules around this workflow
Each part of the platform is stronger because it links to the stages before and after it.
Mood Board Software
Create room-based mood boards for interior design projects with flexible composition, AI photo enhancement, client sharing, and a direct path into specs, sourcing, and proposals.
Explore this feature
AI Moodboard Assistant
Use an AI moodboard assistant for interior designers to review visual balance, materials, palette direction, and client-ready concept strength.
Explore this feature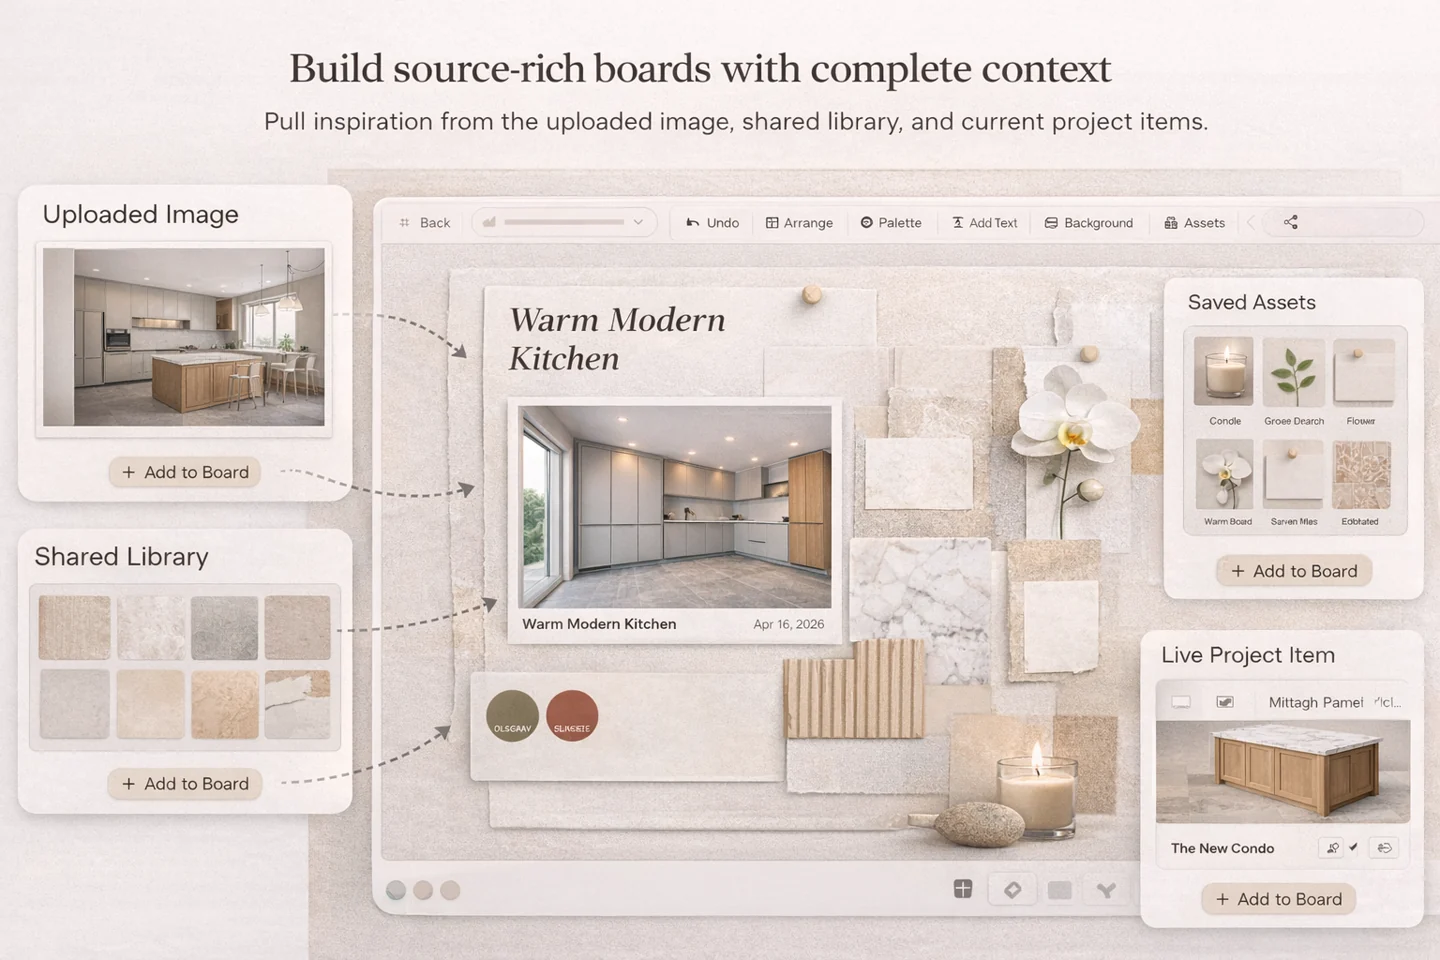
Mood Board to Product Selection
Turn early design moodboards into organized product selection workflow with client review, specifications, and proposal-ready follow-through.
Explore this featureFAQ
Questions studios often ask about this workflow
Clear answers for teams evaluating whether this part of the platform fits their process.
What can be removed from an image?
Designers can remove unwanted objects, people, watermarks, and distracting visual elements from room images or product photos before presentation.
Does this feature change the whole image design?
No. The goal is cleanup, not redesign. The marked region is inpainted based on surrounding content so the image stays useful in the same moodboard context.
Does object removal use external AI APIs?
No. The feature runs on self-hosted local AI infrastructure, so project images are not sent to a third-party API for this cleanup step.
Does object removal use AI credits?
No. Because the inpainting runs locally, object removal does not consume AI credits.
Can the designer undo or revert the cleanup?
Yes. The cleanup is non-destructive at the board level, so the designer can undo or revert if the result is not right.
See it in context
Start free to explore how this feature works inside the full studio platform
Diako Studio is built to help interior design studios connect creative workflow, client approvals, sourcing, proposals, purchase orders, and invoicing in one place.